Share the post "Buying a used bike: the list of 10 things you absolutely must check"
The raw material shortage affecting many industries has not spared the cycling market. And it’s likely that for you too, your bike shop is out of stock and you’re forced to look for used bikes. Don’t worry! That’s also a good idea, and it’s just as possible to find what you’re looking for. But only if you do a few checks to avoid an unpleasant surprise. 3bikes.fr has thought of you and offers here an example of a checklist of 10 elements to check before buying a used bike.
By Jean-François Tatard – Photos: depositphotos.com
First of all, a new or used bike should be test ridden. That’s the first thing you should do. Indeed, it’s important to try the bike to make sure it has no defects or malfunctions and that it fits you perfectly. And if you are convinced by this first test, you can then resume your checklist, which will allow you not to miss anything among the things to check before buying.
The list of things to check before buying a used bike
In order:
1. Check the bike’s history
What was the previous owner’s use of it? How was it maintained? Under what circumstances is it being sold? Why? Why was it bought? How long ago? Where and from whom? Have there been any crashes? Any repairs? Where? By whom? How? Where does the bike sleep? In the cellar? In the garage? On the balcony? If the seller is acting in good faith, they will give you all the information, including a good estimate of the mileage, and will not try to hide the reality. And in the worst case, Strava is an excellent tracking tool. You just need to check on the cyclists’ favorite app how the previous owner behaved in terms of use (mileage, speed, elevation, location, etc.).
2. Check the frame
If there’s one main component on a bike, it’s the frame. Carefully check the frame for any cracks. Pay particular attention to the areas where forces concentrate on the bike frame: head tube, bottom bracket shell, chainstays. Laterally, push hard on the crank positioned downwards with your foot. That will give you a good indication.
3. Check the headset
To check the condition of the headset, lift the front wheel and turn the handlebars from left to right. The bearings should not show any resistance or crunching. Also, apply the front brake and move the bike back and forth. The headset should not have any play, otherwise it means it will need to be replaced.
4. Check the stem, handlebars, saddle, and seatpost
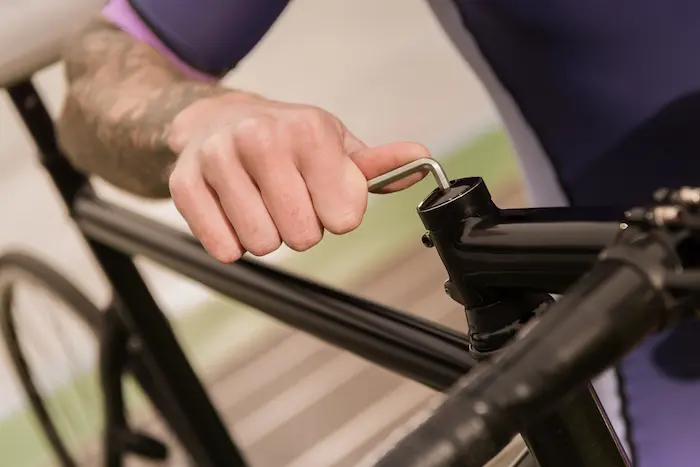
First, visually check for any cracks. Then check the condition of the screws and threads. Grab the handlebar by the drops and push hard on it. Better it breaks now than on a steep descent. But normally, if it’s in good condition, your strength won’t be enough to break it. As for the seatpost, it should not be cracked or damaged. Furthermore, once the bike is adjusted to your size, there should be at least 10 cm of seatpost remaining inside the frame. Otherwise, it’s too short. As for the saddle, it should not have any play or tears, and look carefully under the saddle clamp for any cracks, and on the rails as well.
5. Check the condition of the wheels
Remove the wheels from the bike. Spin the wheels while holding them by the hub. Check that the bearings don’t crunch. Manually check that all spokes are sufficiently tensioned. The wheels should not be warped. Once on the bike, check how they react to braking. You should not feel any play. Finally, check the entire rim for any cracks. And also check the braking surface if you still have rim brakes. Or that the rotor is not warped if it’s disc braking. Take your time.
6. Check the tires
This isn’t the best indicator, because generally you won’t hesitate to change them. But just in case, the tires should not be cracked or have any cuts. If the surface is completely flat, they are at the end of their life.
7. Check the brakes
Check the responsiveness of the brakes. For disc brakes, if you feel that the brake lever is too soft, it probably means a bleed is needed. Also check that the rotors are not warped. Visually inspect the condition of the pads as well. And for traditional rim brakes, check the cables and housing and the wear of the pads.
8. Check the chain
There’s a small tool to measure chain wear. Borrow one. Simply put, if the chain has stretched, it’s a sign that it’s worn. The less the chain reveals the teeth of the chainring with the small tool, the less worn it is. The chain is changed quite often, and it’s better to change it more regularly to avoid having to change the cassette and/or chainrings as often.
9. Check the chainrings
To determine the wear of a chainring, the best way is to look at the shape of the teeth. The more pointed the teeth are, the more advanced the chainring wear.
10. Check the derailleurs
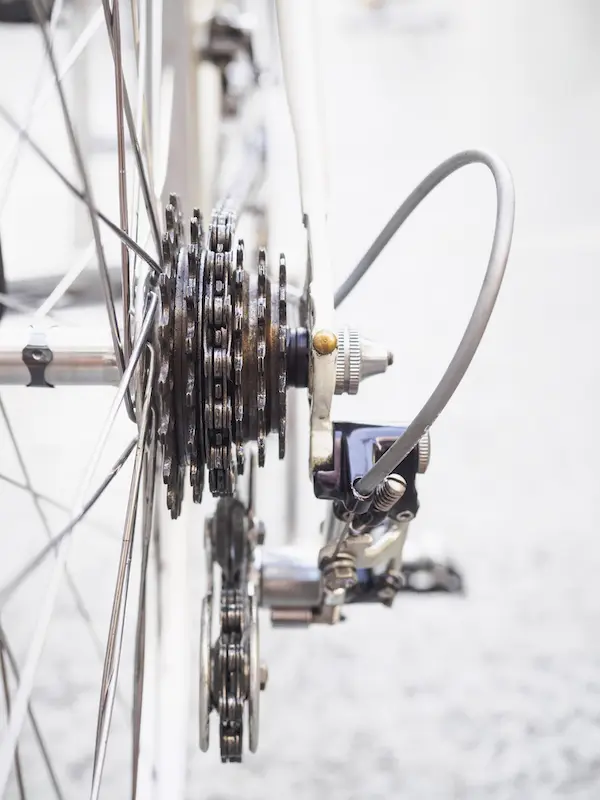
The front and rear derailleurs are probably the most technical components of a bike. The best advice we can give you is to check them under real conditions. Also check the condition of the derailleur pulleys, the derailleur hanger, the gear indexing if it’s mechanical, and the return of the return springs. By the way, if you opt for electronic shifting, don’t forget to ask for the battery charging cables.
In conclusion…
To avoid any misunderstandings, it’s important to clearly define the payment terms in advance. But before finalizing the transaction, take your time. Carefully check all elements and components. Also compare prices and make sure everything is in line with market reality. And if you don’t feel comfortable with the process, get help from a professional or an expert you trust.
=> SEE ALSO: All our Gear articles
Share the post "Buying a used bike: the list of 10 things you absolutely must check"