Share the post "Handlebars and Stem: How to Choose?"
By Guillaume Judas – Photos: @3bikes.fr
Most of us today have to position ourselves well with production frames, or worse, with complete bikes sold without the possibility of modifying the position components at the time of purchase. What a heresy! As if we were all the same, or simply the result of statistical studies… A bike’s cockpit is not just for steering. It’s also a support point, on which comfort and performance depend.
Poor adjustment of the handlebars and stem can cause tension and pain, excessive wind resistance, or poor weight distribution. Apart from the need to customize these two components at least in terms of height, length, and inclination adjustments, you first need to know how to choose them.

Stem: length and angle
The height of the cockpit from the ground depends on the stem’s position above the head tube. While it’s relatively easy to change the length of a stem (which can usually be found in lengths from 70 to 140 mm), its height adjustment can be limited by the size of the bike’s head tube. If it’s too low, you’ll need to add (sometimes too many) spacers between the top of the headset and the stem. If it’s too high, you might not be able to lower the handlebars enough. The head tube size should therefore be one of the first criteria when choosing the bike size. However, there are different stem angles, which allow for adjusting the cockpit height if necessary. You can find them at 0° (or 90, it’s the same), 6° (or 84), 7° (or 83), 8° (or 82), 10° (or 80), or 17° (or 73), or even exceptionally higher. Some stems are reversible, which allows for an inverse angle.

What does this correspond to? You first need to consider the bike’s head angle (between 70 and 74°, but most often between 72 and 73°), which means that a 0° stem is perpendicular to the head tube, and therefore points upwards. A -17° stem, on the other hand, is almost horizontal with the ground. If you want to change the stem angle, you can calculate the induced height difference by multiplying the cosine of the angle by the length of the two stems.
For example, if we take a 100 mm stem, a -6° angle lowers the position by 10.45 mm compared to a 0° angle, a -10° stem by 17.36 mm, and a -17° stem by 29.23 mm. No need to worry too much about the diameter, however, both for the steerer tube and the handlebars, as this is now standardized, unless your equipment is too old.
Handlebars: width, drop, and reach

This initial adjustment sets the position of the stem’s attachment to the handlebars. But then there are dozens and dozens of handlebars with more or less different shapes and dimensions. The handlebar width, center-to-center or measured on the outside of the tube, is the easiest to establish. Ideally, you should choose it in relation to your shoulder width. A narrower handlebar closes your rib cage a little, but has the advantage of offering you a more aerodynamic position.
With wider handlebars, you have more leverage when you stand out of the saddle. To complicate matters, many models are slightly flared downwards, and are therefore a little narrower at the brake lever clamp than at the bottom of the handlebars.

They can also be flared at the top, to offer a more natural wrist position when climbing with your hands on the tops. The drop (in cycling terms) is the distance between the highest point of the handlebars and the lowest part, provided that the latter is parallel to the ground. If you angle your handlebars forward, you virtually increase their height, and thus lower the position of your hands.

The reach is the distance between the furthest back point of the handlebars and the furthest forward point.
It influences the positioning of the brake levers and also the grip of the handlebars with hands in the drops. A so-called compact handlebar, which is very common on bikes today, has dimensions around 125 mm in drop and 80 mm in reach, but it is obviously possible to find models with more or less difference between the upper and lower parts, or more or less deep. And this can quickly change your position on the bike by more or less a centimeter, or even more.
Refining the position
If you feel any discomfort or the slightest difficulty in transitioning from a position with your hands on the tops (the only fixed position, once the stem length and angle are determined, as well as its placement relative to the frame’s head tube), to a grip with your hands on the hoods or in the drops, you therefore need to pay attention not only to the handlebar dimensions but also to its orientation. The position of the levers is also essential, especially since with integrated gear shifters, the trend today is to ride with hands on the hoods.
If your levers are angled downwards, you may experience tension in your arms, shoulders, or neck.
If your levers are angled downwards, you may experience tension in your arms, shoulders, or neck. It is therefore more advisable to raise them so that they are at least in line with the top part of the handlebars.

To get the right orientation, most riders are simply tempted to angle the bottom of the handlebars forward, to bring the levers closer. With the consequences imaginable from reading the previous paragraph. This is a mistake that most often leads to never using the drops position. It is regrettable that even on production bikes, poor initial assembly is observed. Fortunately, it often only takes a little patience and removing the bar tape to perfect this adjustment.
Aero

Against the wind, the enemy is the round tube. A “classic” handlebar is made of round tubes, but for some years now, manufacturers have been offering handlebars with tapered shapes on the top part. In addition to a comfortable grip because the palms rest flat, this saves a few watts. Up to 6 watts at 45 km/h for an aero and streamlined cockpit compared to a round handlebar with external cables. Not negligible.
Materials
For a cockpit, it’s either aluminum or carbon, or even aluminum covered with carbon (without much interest). Aluminum is heavier, but very stiff and much cheaper. Saving weight on this component with carbon is not necessarily wise, as lightweight handlebars often lack stiffness. On the other hand, carbon allows for much more complex shapes than aluminum. The goal here is to gain in aerodynamics, comfort, and ergonomics.

Monobloc handlebars
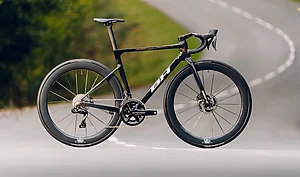
Finally, there are the monobloc handlebars, with the stem and handlebars molded together. Rigid, aerodynamic, and aesthetically pleasing, they inherently prevent personalized orientation of the handlebar drops. And the final position will depend not only on the handlebar’s dimensions but also on the frame’s head tube angle.
| A tip for adjusting brake levers If you’re wondering how to adjust your two brake levers to the same height, simply place your bike on the ground, on the fork and without the front wheel. It’s then easy to measure the precise distance between the ground and the ends of each lever. |
-> SEE ALSO : All our Gear articles
Share the post "Handlebars and Stem: How to Choose?"