Share the post "8 indoor trainer sessions"
When you get on your indoor trainer, do you wonder what type of session to follow and what exercises to do? Follow the guide!
By Guillaume JUDAS – Photos: Tacx / 3bikes.fr
| WHERE TO FIND AN AVAILABLE INDOOR TRAINER? Manufacturers and importers are struggling to meet the enormous demand for indoor trainers, especially during this lockdown period. Nevertheless, we have found a few devices still available for you:
|
-> SEE ALSO: How to choose an indoor trainer?

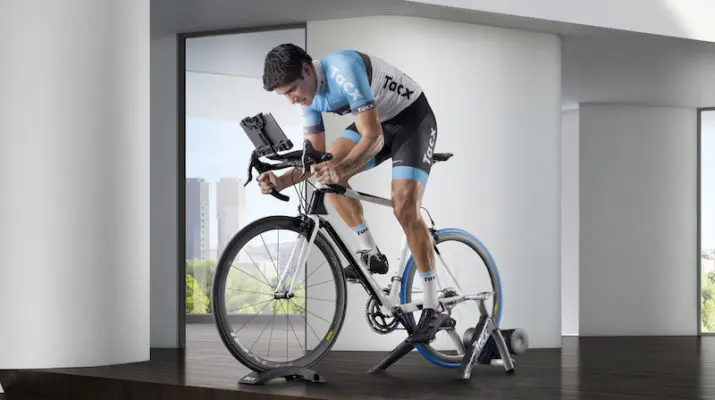
Virtual races on Zwift, or simulated routes from an imported GPS track, are all the rage. But for this, you need a smart indoor trainer and a subscription to a dedicated application. With a simpler device, it is still possible to train correctly, by following the typical sessions described here.
Some recommendations
Even if it’s cold outside, prefer to ride in an airy room. Even if it’s a normal phenomenon, the abundant sweating encountered when cycling in place is of no help for eventual weight loss. Keep that in mind! So avoid riding too bundled up (summer cycling attire is perfectly fine), and keep an energy drink within reach if possible to limit the loss of mineral salts. Remember to protect your bike (especially the front) from acidic sweat drops that relentlessly attack the screws (stem, brakes…). To avoid boredom, you can plan music or television, as you have to account for the inevitable wear and tear that this type of training causes. Don’t give up everything in the first few weeks of winter!
Objective: endurance
When? In winter and at the start of the season, alternating with traditional road rides.
How? It is impossible to replace the ability to ride for a long time acquired through increasingly long road rides. Sweating is also so excessive on an indoor trainer that it would be counterproductive to do overly long indoor sessions. Nevertheless, improving general physical condition requires regular and frequent activity. This type of indoor trainer session allows you to maintain your pedal stroke, or even optimize its automatism between road rides. For this, you must ride at a sufficient intensity for the session to be beneficial.
Duration: 40 minutes to one hour. Allow 5 minutes for a gradual warm-up and 5 minutes for a cool-down.
Intensity: 70 to 80% of maximum capacity, continuously.
Advantage: interesting for resuming training, or during the season to physically “desaturate”.
Disadvantage: quickly becomes boring.
Objective: pedaling technique
When? In winter and at the start of the season, alternating with traditional road rides. Ideally, after a few hundred kilometers of training, when physical condition is already advanced.
How? Riding fast and/or for a long time in peak season requires a clean and economical movement. Instead of accumulating endless road rides to force the body to integrate what becomes second nature, more targeted sessions improve muscular efficiency during effort. You must therefore work on extreme gears to improve subsequent coordination and at a normal pace. You can ride either with a very large gear, or on the contrary at a very high cadence, or even by pedaling with only one leg, alternating right and left.
Duration: 40 minutes to one hour. Allow a gradual warm-up of 10 minutes, as well as a cool-down of the same duration. Integrate exercises of two to five minutes, with maximum gear or minimum gear, alternated with rest periods of the same duration as the exercise. Monitor heart rate during the exercise so that it does not exceed 80% of maximum capacity.
Advantage: fun and precise work.
Disadvantage: the feel of an indoor trainer is not always identical to that of real conditions.

Objective: intermittent training
When? After the recovery period, for improving aerobic capacity. The goal is to break the monotony of continuous work, to stimulate both the body’s adaptation capacities and the interest of the session.
How? By alternating sustained intensity effort fractions with moderate intensity effort fractions. Use either the speed sensor, the heart rate monitor, or the cadence sensor or power meter for those who have them.
Duration: 40 minutes to one hour. Allow for a gradual warm-up and cool-down. Vary the effort and recovery times within five-minute segments, for example: 1 minute at sustained intensity with 4 minutes of recovery, then 2 and 3 minutes, then 3 and 2 minutes, and finally 4 and 1 minute. All combinations are possible within the session. The important thing is to manage the intensity of the effort in relation to the time allotted for recovery. Aim for approximately 85% of maximum capacity during the exercise, alternating with periods at 50% for recovery.
Advantage: truly boosts physical condition.
Disadvantage: requires concentration.
Objective: anaerobic threshold
When? From early spring and throughout the season, at a rate of one session every ten days or so. This type of session is perfectly reproducible on the road and vice versa. When competitions are close together, it is no longer useful to do this kind of session. Otherwise, to maintain one’s level, it is necessary to solicit this energy system at least once every ten days.
How? Ideally with a power meter, on the bike or integrated with the indoor trainer if it is equipped. Determine the power corresponding to the threshold after a laboratory test, or use heart rate as an indirect indicator. But be careful, with heat and dehydration, as the duration of the effort progresses, heart rate tends to slightly overestimate the actual intensity of the exercise. Similarly, a power meter used on a bike mounted on an indoor trainer slightly underestimates the power delivered compared to the same effort on the road. Count 7 to 10% less, due to lower friction. It is therefore necessary to adapt by feel an effort intensity that is perceived as difficult, but reproducible.
Duration: 45 minutes to one hour depending on the level. After a 10-minute warm-up, perform three sets of 5 to 10 minutes at a very stable intensity, between 85 and 90% of maximum capacity. Never exceed 10 minutes on the indoor trainer. Recover actively for a duration equal to that of the exercise. Finish with 10 minutes of cool-down.
Advantage: ideal target intensity for progress in an endurance sport.
Disadvantage: demanding session.

Objective: intervals
When? In spring or from D-2 months before a goal. This type of session is perfectly reproducible on the road and vice versa. When events are frequent and repeated, this work can be abandoned.
How? To progress in MAP (Maximum Aerobic Power), you need to produce a high level of power for as long as possible during a session for this training to be productive. However, it is by breaking down very intense efforts, alternated with periods of active recovery, that it is ultimately possible to achieve the most “useful” time for developing these qualities. The idea is therefore to alternate periods of very intense effort with a recovery time greater than, equal to, or less than the work time, depending on the level.
Duration: 45 minutes to one hour, including 10 minutes of warm-up and cool-down. The durations of effort fractions are variable and depend on the ability to maintain a high level of muscular output. They should be cross-referenced with recovery time. Progress is made by increasing the total time at high intensity and decreasing the time devoted to recovery. Thus, one can consider effort fractions of 15 seconds to 1 minute, with as much recovery. The intensity is maximal, but the heart rate only reaches its peak after a few effort fractions.
Advantage: effort calibration is quite simple on an indoor trainer.
Disadvantage: demanding session.
Objective: MAP with counter-exercise (“Gimenez” exercise)
When? The “Gimenez” model proposes a very intense 45-minute series to be performed on an indoor trainer rather than on the road, particularly for effort regulation. This type of training should be performed to get into shape, or during periods without competition. It falls more within the framework of rigorous and precise preparation, to be defined according to objectives.
How? Following the ESIE scale (Subjective Scale of Effort Intensity, calibrated from 1 to 7), the session is built around nine 5-minute segments, broken down as follows: 4 minutes at I3 (just below threshold intensity) and 1 minute at I5 (above threshold). The main difficulty lies in properly dosing the power delivered during the four minutes at I3 so as not to burn out before the complete series.
Duration: including a warm-up and cool-down, the session lasts 65 to 70 minutes.
Advantage: very complete session.
Disadvantage: very demanding training.
| ESIE or the Subjective Effort Intensity Estimation scale In order to use a common language, easily understandable and reproducible in training programs, the French Cycling Federation coaches decided to use a tool developed by Frédéric Grappe, the ESIE scale. This tool is based on field observations and empowers the athlete based on their perception of effort intensity. It can be related to an intensity measured with a power meter or a heart rate monitor, knowing that in the latter case the index is not always reliable. Athlete’s perception I1 -> No muscle pain, easy pedaling, very easy conversation, fatigue over several hours. I2 -> No muscle pain, easy intensity maintenance, easy conversation, fatigue over three or four hours. I3 -> Muscle tension, sustained intensity, stable ventilation, difficult conversation, exhaustion after two hours. I4 -> Progressive increase in muscle pain, progressive increase in ventilation but controllable, difficult conversation, exhaustion after twenty minutes. I5 -> Rapid increase in muscle pain, rapid and difficult to control ventilation, very difficult conversation, complete exhaustion between five and ten minutes. I6 -> Extreme suffering during exercise, maximal muscle pain, impossible conversation, very significant nervous fatigue, maximal hyperventilation at the end of exercise. I7 -> No muscle pain, impression of an exercise in apnea, very significant nervous fatigue, hyperventilation and muscle tingling at the end of exercise. Source: Cycling and Performance Optimization, by Frédéric Grappe, De Boeck editions. |
Objective: sprint
When? Almost all year round, outside of the recovery period. This type of training can be combined with normal road training, replacing a ride or as a supplement.
How? With an indoor trainer that holds the bike securely, the idea is to let loose without fear of losing balance, at maximum cadence or, conversely, with maximum force, but always for a very short time, from 7 to 20 seconds maximum. Very gentle recovery takes 2 to 5 minutes, depending on the length of the sprint. Be careful, because between a long sprint and a short sprint, different energy systems are used. The impact on training and planning is, of course, different.
Duration: with a gradual warm-up and a 10-minute cool-down, a 30 to 40-minute session can be enough to work on and then maintain the speed and power qualities necessary for sprinting.
Advantage: easy and fun session.
Disadvantage: requires a very stable device.
Objective: active recovery
When? All year round, depending on needs and desires.
How? Ride gently with a light gear, simply to get the body moving and actively eliminate waste products from a previous ride. Variant 1: start gently on a small chainring, and increase the gear by one tooth every 3 minutes, until you feel a slight sweat. Variant 2: after a 10-minute warm-up, do two very stable, smooth sets at 70/75% of maximum capacity.
Duration: 20 to 40 minutes, depending on the content of the session and how you feel.
Advantage: pleasant session that desaturates the body.
Disadvantage: little benefit to physical condition.
-> SEE ALSO: All our Coaching articles
Share the post "8 indoor trainer sessions"